Engine casings
Honda applied paint to the following casings only:-
1. Cover, cylinder head; 2. Upper Crankcase Cover; 3. Cover A, Dynamo; 4. Cover, L. Crankcase; 5. Cover, Clutch adjust and 6. Cover, R. Crankcase. My engine was very badly corroded so I ended up filling and painting all but the cylinder head and barrels.
Cleaning: After the initial strip down it is time to de-grease the casings, this has to be done and will help to minimize blasting media from adhering. Old paint can be removed with paint stripper but the usual and best method is to bead blast. Vapor blasting will give extra fine satin finish, bead blasting a satin finish & aluminium oxide a matt finish. Use old engine bolts and rubber bungs if you want to make the final clean up easier. I didn’t bother because any amount of grit, large or small would ruin an engine and you’re going to have to clean it anyway. The mating gasket faces were left bare, but I did make sure not to blast directly on to these. Removing the engine studs is not recommended, attempting to remove these often results in damage to the threads.
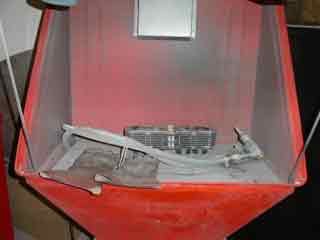 My blasting cabinet.
After blast cleaning to remove any traces of grit I did the following: 1; Remove oil inspection plugs from crankcases. 2; Oil ways were cleaned using white spirit and engine brushes from Frost restoration. 3; Greased taps were run through threads. Large threads i.e. tappet inspection holes, were cleaned with a tooth brush. 4; Cases washed in detergent. 5; Cases rinsed with pressure washer. NOTE: most grit seemed to be in the main oil galleries at the front of the crankcases, this MUST be clinically clean.
Preparation: Any small scratches in the aluminium can be rubbed out with wet or dry if not too deep, concourse restoration will require every imperfection filling at this stage. Remember any paint finish is very thin and it usually highlights the slightest blemish. Preparation is everything and all surfaces must be clinically clean and free from oils, waxes and grease.
Priming: Some people prefer to use etching primer to prepare the aluminium surface before painting, I didn’t bother and the paint has adhered really well.
Air cooled engine temperature: Normally around 85 centigrade in a temperate climate.
Objectives – In an ideal world we would like a paint that is heat proof, does not yellow, has good adhesion and chip resistance, finally one that is also fuel proof. Holy grail? read on.
Paints:
OEM paint – This was a very fine silver particle paint and was most probably a lead based stove enamel.
2 pack (2K HS Isoakryl) – 08707-NH35M Cloud Silver is a close match if you can afford it. Finish using 2 pack satin clear to complete the illusion. Known to have excellent flexibility, fuel and chemical resistance, high build per coat, high gloss and retention of gloss. Great on a show bike but whether it yellows with road use, I do not know. More information from manufacturer Lechler.
I have seen 2 pack in aerosol form on eBay. Pressing a pin releases the enclosed hardener, shake and apply within 24 hours. Downside is the cost of around 15 pounds sterling and the Health & Safety implications below.
Warning: 2K is very toxic when applying and requires a high level of protection,.Not for the DIY enthusiast with a paper face mask as the toxins can even enter through tear ducts in the eyes.
Powder coatings: very cheap, petrol splash proof & durable but be prepared to lose some definition, for example the sprocket covers etched gear numbering. There is a chrome silver very close to polished aluminium that I would choose. You will want thermoset polymer so it doesn’t re-melt with the engines heat. Ask the coater to keep the coating as thin as possible, it does tend to go on rather thick & enquire about gasket surface protection. Guide to cost in 2011 is around £10 per casing & around £50 for a crankcase, due to extra work masking off oil galleries and bearing surfaces.
DIY painting
I always apply three light coats and therefore a complete engine will require more than one 500mL aerosol.
Simoniz/Dupli-color Aluminium engine enamel – recommended by some restorers. Requires no primer or lacquer. This is only fuel resistant after baking in an oven at over 220C for at least 90 minutes, could be a problem if any body filler repairs have been made. Try J B Weld as a filler or Technoweld or just rub out minor imperfections. Don’t think it will have any resistance to fuel if baked at say 100C, it will not. After 90 minutes at 230C my steel test piece came out of the oven exactly the same colour as it went in and appears to have a hard durable finish. I then soaked the enamel in fuel for 1, 5, 10, 20 & 60 minutes and believe it or not, it remained intact.
Now to the Honda aluminium cases, after 90 minute bake the test case has lost some of the satin sheen & is now near to matt finish. Worst of all, there are some small bubbles which if rubbed with my finger pop and leave pin holes in the coating. The cases were as clean as possible but something has reacted at the high temperature. Maybe the trick here would be to use a degassing agent similar to that used by a powder coatings company?
Warning: While curing in an old oven allow plenty of ventilation to the area to avoid build up of toxic fumes. Not recommended to use the same oven you cook food in!!!
PJ1 coatings – Metal flakes large and yellows slightly with engines heat, especially so if coated with PJ1 clear lacquer. Not correct choice for this bike.
Simoniz 5 wheel silver – Quite a close colour match, finished with Plasti-Kote clear lacquer the effect is excellent and does not yellow. Downside is that acrylic paints & lacquers have no resistance to fuel.
Halfords petrol resistant lacquer – gives good protection. I had one cover using this and after 3,000 miles had not yellowed further. Recommended for coating fork legs, brake plates, hubs or any bare aluminium. Drawbacks are, it runs/sags very easily & becomes more yellow with each coat applied.
Hammerite smooth aluminium – used by some and is supposed to be fuel splash proof.
Plasti-kote Hot paint – Does not yellow at very high temperatures, good colour match but seems to remain quite soft even after baking in domestic oven (250C max) and still had little resistance to petrol. Manufacturer recommends baking at 315-345C so would require an industrial oven and may damage the crystalline stucture of the aluminium? This would be a good choice for exhaust manifolds etc if you can’t afford chrome.
RS bike paint– recommend:- Start with clinically clean bare metal, apply etching primer, apply 22944 Cloud Silver and finish with satin 2K laquer. Also can supply fuel tank/side panel paint for all colour variations.
Conclusions – I give in and unable to recommend any particular paint for amateur application. All manufacturers make wonderous claims for their coatings, but ask any professional and you will get the same opinion on rattle can paint (not complimentary by the way). I recommend professional 2K or powder coating as the only two options available. Always wipe off fuel spills immediately, no matter whatever the coating maybe. My OEM Honda lacquer on the tank has blistered round the filler cap – FILLING TANK ON PROP STAND ONLY will help ensure you don’t overfill, REMEMBER – heat from the engine will cause the fuel to expand and carbs are prone to flooding if the bike is not in regular use.