There are many sources of these reproduction graphics. I used Z-power decals, see links page or they can be found at many of the major classic bike shows.
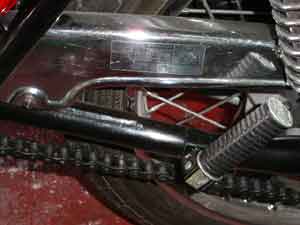
Position of the tyre pressure decal on the chain guard.
Position of the helmet holder on the frame and side cover, the battery breather Caution and exhaust warning decals.
Position of the E2 head stock decal.
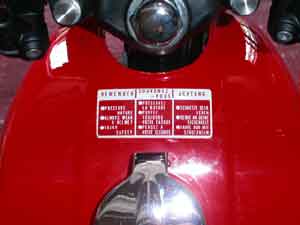
Position of the helmet warning decal. Honda never lacquered over these so be careful not to spill or overfill with petrol. Try to find a laminated replacement that is claimed to be more fuel resistant.
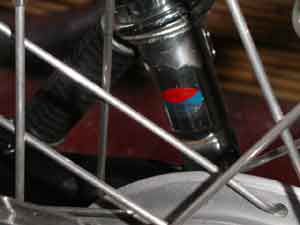
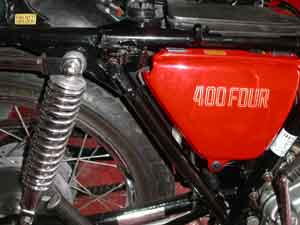
Position of the rear shock absorber decal. NOTE: I have seen these on the inside and outside of the dampers, which way round is correct I do not know.
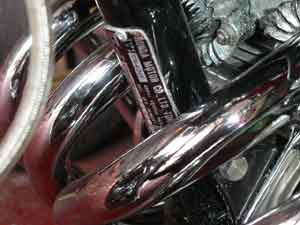
Position of the metal chassis plate. I used a pop riveter to replace after powder coating the frame.
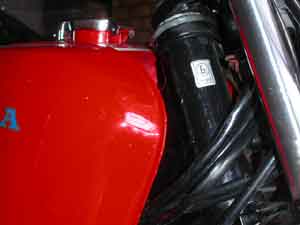
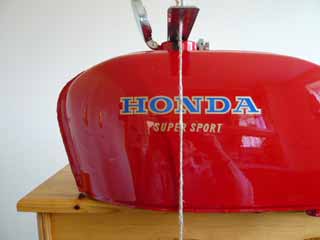
Original Honda position for tank & side panel decals:
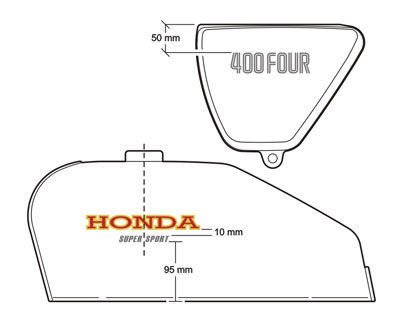
On the other side aligning the two ends of the word Honda may shift the N slightly off centre of the filler hole.
Images show OEM tank, worth noting – alignment is not exact from tank to tank, anywhere near this is OK.

Application advice:
1 Wait at least 24 hours after painting (ideally 7 days) before applying decals, this allows the volatile solvents to escape.
2 Apply at room temperature only.
3 Always ask your supplier for application advice i.e. wet or dry application, whether to clear coat etc.
4 Remove any air bubbles with a pin.
5 Over coating with two pack clear lacquer is tricky. Some painters recommend a light mist coat followed by a full coat after 30 minutes. If the decal had a border, use it as a test on some scrap metal sheet as not all 2 packs are the same. NOTE: Clear cellulose will cause the transfers to shrink and must be avoided.
Aftercare:
Clear coated decals should last for many years however, always wipe off any fuel spills immediately.