Project – Adding a gel pad insert and recovering the seat
This job looks quite a daunting prospect, at least it was to me anyway. I couldn’t bring myself to canibalise my rust free original seat so I purchased a good used example, knowing that if I failed I had a fall back position.
Materials
I bought the medium gel seat pad made by Dan Medica South Ltd. It’s just slightly oversize and requires triming with a craft knife along the sides. This is a sticky job and when you have the pads shape correct wrap in clingfilm to seal.
20″ x 30″ x 1/4″ upholstery grade foam sheet.
500mL aerosol of Contact Adhesive.
Seat cover, 13 x studs & strap, unless re-using the originals. All available from David Silver Spares Ltd.
2 metres of PVC metal edge trim. I had to replace the damaged original to avoid the sharp edge cutting my new cover.
Replacement seat foam if past redemption, available from P & K Classic Bikes £65 also seat cover & strap £40 (2011 prices).
Procedure
Remove the seat strap, 13 studs and then the seat cover. Inspect the foam carefully for rot and if wet allow to dry for some days. If needed a replacement seat foam is not available, your only option is a complete pattern seat. Honda provided 55mm depth of foam (maybe why the Gel insert is a good idea?) and it is glued to the metal base. You may at this point want to consider painting the metal base before continuing.
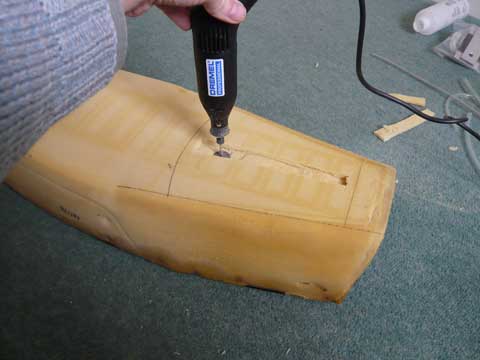
Transfer the gel pad shape onto the foam, mark out clearly to ensure accuracy of your cutting.
I used a Dremel with a cutting disc to remove the foam, others use an electric carving knife. Start in the centre and work your way outwards towards your markings. Do a little at a time, remember you can always take off more but cannot add any.
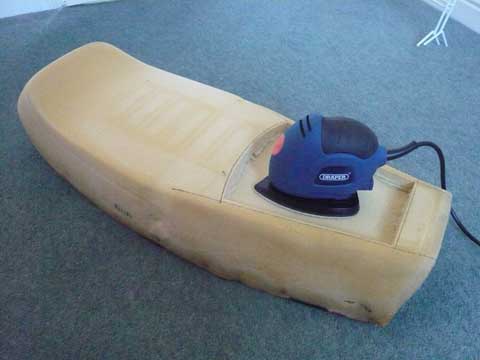
When satisfied with the fit, the gel pad should be slightly proud of the seat. Using a detail sander & course grit paper, I sanded the foam to a smooth surface, checking with gel pad till it sat flush with the seat top.
Glue pad in place using contact adhesive.
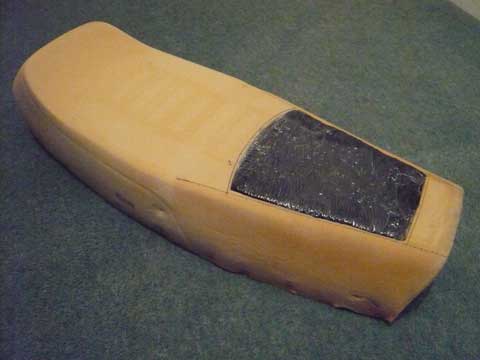
Dan Medica recommend fitting the seat cover to maximize the effectiveness of the Gel pad. I chose a compromise and glued on 1/4″ smoothing foam sheet to better hide the joints.
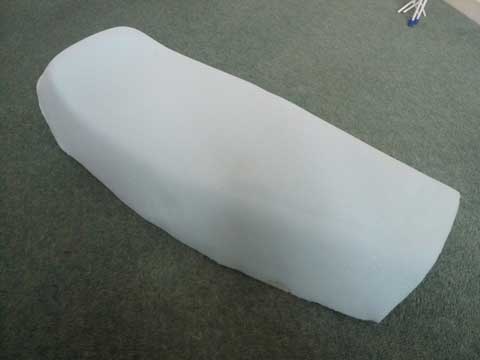
Inspect and if necessary renew damaged edge trim, the metal is very sharp and would soon cut through your cover.
Turn seat cover inside out, place on to foam and then working from front to back turn right side out. Fixing front and then pulling tight the rear onto the metal hooks. Now working front to back, do the sides in a criss cross fashion, you must pull the PVC tight as you go.
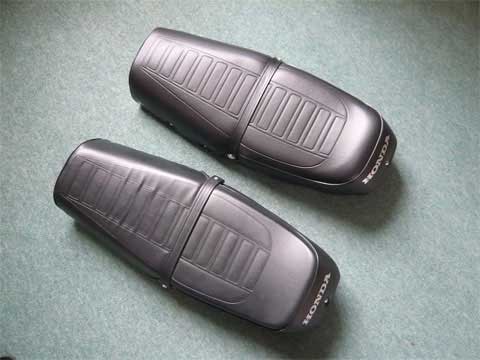
Add the 13 studs, I made holes for these with my soldering iron (avoiding breathing the fumes). Re-attach the seat strap, if using a new cover trim excess PVC with your craft knife and finally replace the catch and hinge. Image shows original seat and modified seat…which is which??
Allow all glues to cure for 24 hours before putting back onto bike & going on a nice long test ride.
Conclusions
The gel pad modification adds around 750g of weight to that of 3250g seat. & retains the original appearance.
First impressions are, the longer you sit on it the more you will notice the improvement. I tend to ride 50 miles to the coast and for this distance it is a more than worthwhile addition to your bike. After 90 minutes when dis-mounted everything held its shape and looked perfect, as time progresses I’ll add updates on wear n tear etc.