Brushed satin finish aluminium – for 1: case, FR. Fork bottoms and 2: Panel comp. RR. Brake
First job is to strip any lacquer from the aluminium using paint stripper. The next step is best achieved using a Scotch-brite mop (like a giant pan scrubber) attached to a bench grinder/polisher. Try to follow the original brushing direction where possible. The finish is almost as new only requiring a final few coats of clear lacquer. My first attempt using clear acrylic lacquer caused the aluminium to oxidize over two or three days curing time. I believe these lacquers are water based, hence the problem. Halfords petrol resistant lacquer works quite well, keep the number of coats to a minimum, it does have a slight yellow tinge. I have seen 2 pack lacquer in aerosol form on eBay. Pressing a pin releases the enclosed hardener, shake and apply within 24 hours. Downside is the cost of around 15 pounds sterling and the Health & Safety implications below.
Warning: 2K is extremely toxic when applying and requires a high level of protection,.Not advisable for the DIY enthusiast with a paper face mask and the toxins can even enter through tear ducts in the eyes. Nitrile gloves and a full suit with external air supply is required, a job best left to a specialist. My painter is quite happy to just add the final fuel proof, non-yellowing 2K lacquer to my paint jobs saving me many £’s. Ethanol added to some Un-leaded fuels is reported to even strip 2K, as there is yet no alternative lacquer, be extra careful when filling up.
Never use steel brushes/wool on aluminium, this will only accelerate corrosion problems. Obtain stainless steel products or in this case Scotch-brite.
Re-chroming fuel filler cap
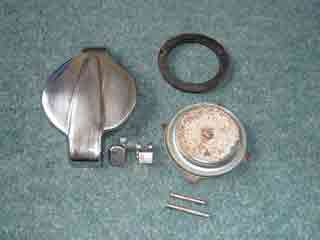
Use small punch to remove filler cap and filler cap latch rivets. To dismantle filler cap prior to re-chroming, rotate the pressure relief valve by holding the filler cap and gently tapping one of the four arrow headed retainers using a flat blade screwdriver and hammer. When rotated so that only two of the arrow points are holding the valve in place, prise out the valve with a medium sized flat bladed screwdriver under one of the arrow points. Once over the lip of the filler cap it will just drop out. Reverse proceedure to re-assemble.
On my (New out of the box) tank, the filler cap was very difficult, almost impossible to close. After further investigation I discovered that it had the wrong rubber gasket fitted, it measured 6.68mm thick against the standard of 4.42mm. Goes to show even at Honda, quality control can fail.
Re-finishing panels with Honda colour matched paints
Match whenever possible to a sample, Halfords Super Stores can offer this service as can Automotive paint specialists.
Colours officially imported to Britain:-
F & F1 = Light Ruby Red HX, not NX as in my parts book (aka Milano Red Code R-81 Honda touch up paint P/No.08703-R81PPAH (0.44oz bottle). In the U.K. 2005 cars from Honda including models Jazz, Civic and Accord have a Milano red option. Carplan/Tetrosyl Red-14 is a match, use white primer. Colour depth of this paint depends on number of coats applied and I’m assured will get very close to the original colour. Available at all good automotive parts stores and a quarter of the price of a motorcycle specific paint.
F & F1 = Varnish Blue MW. “1989 Toyota HiLux paint code 8A1 medium blue” on white primer is a close colour match, I think a shade or two darker than original. Most cities in the UK will have a paint specialist that can make up aerosols to a colour code, twice the price of the mass produced car colours but around 50% less than motorcycle specific paints and usually have a much better spray nozzle. “BMC Nautilus Blue (Carplan/Tetrosyl blue 15)” is a close match for the less discerning painter on a tight budget. Worth noting being a dark colour it will show orange peel the most and of course show even the lightest of scratches.
F2 = Candy antares red, Honda code R-6C-S the hardest colour to match, try Opel L501 or RS Bike paint.
F2 = Parakeet yellow, Honda code Y-31 try Opel L407.
NOTE: All paint colours are subject to fading over the years and from one batch of paint to another. The blue fades much less than the other colours, worst being “Candy Antares Red” and “Parakeet Yellow” as they absorb the most UV light. Body panel specialists always paint up to a fold in the metal, to a piece of trim and if not available or faded the entire panel.
Obtain more than one quote for painting, my local bodyshop £150, Motorcycle painter at Stafford bike show £375 = 150% markup!!!! prices correct 2011.
See also:- Pattern parts section
Gloss Black
Frame & swinging arm
Indicator mountings
Headlight shell
Satin Black
Clocks
Center & side stands
Top yoke
Powder Coatings
For a concourse finish the first coat is usually rubbed down and a final thin top coat applied. A coating specialist used to motorcycle work is advisable, he will be able to detect any weaknesses in the frame after shot blasting and advise as necessary. Protect the coating with bandages while assembling the various components. I find it best to lift the frame onto the engine rather than vice-versa. Now with the engine bolted in fit the center stand, suspension and wheels to lift upright (WARNING: 2 people are recommended here unless your back is 100% plus some). Another possibility would be to assemble the bottom end only, then fit barrels, cylinder head etc; after fitting engine in frame.
If the coating should get scratched first rub with 1200 grit wet & dry paper, follow with T-cut and then polish with a quality wax.
Chrome and zinc plating

Best left to a specialist. Chrome plating is expensive and zinc very cheap, remember the final finish is dependant on the metals finish, any rust pitting will show through unless ground back to clean metal. Always try to use a plater that has been recommended by a fellow restorer, if badly done the results are awful. Do also remember that Honda didn’t always polish everything chromed to a mirror finish, a good example being the brake pedal and exhaust collars. Just having the item re-chromed gives a satin finish and is of course cheaper.
Tip: When replacing new or re-chromed parts. The chain case in particular is awkward to fit, protect your investment with cloths or thick polythene sheet to avoid damage.
Zinc chromate (yellow finish) is applied to some automotive parts for even better corrosion resistance and it stops zinc oxide (white spots) forming. Which parts of a CB400F used this I know not, e-mail me if you can help add to my short list.
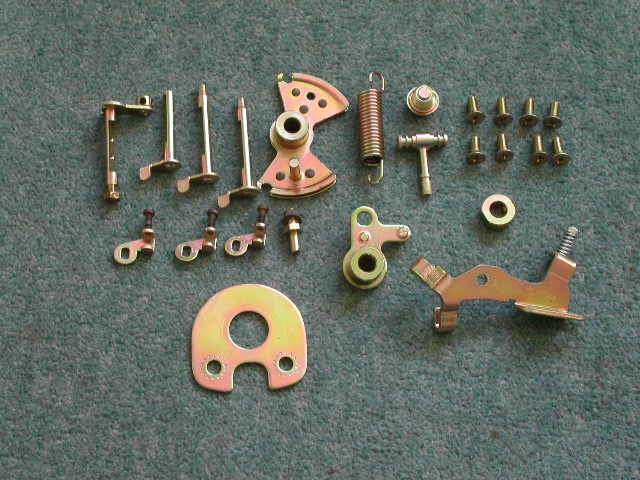
1. I think most of the screws and bracketry on the carburetors including the two levers forming p/no.16017-333-004 Link Set (Choke and idle speed levers).
2. Rod comp., RR brake p/no.43451-377-000.
3. Pipe, main stand pivot p/no.50526-286-000.
4. Side and center stand springs.
Tip: When sorting parts for zinc plating, how about having the tool kit re-plated, I did and it looks better than new.
Warning: Do not have the rear brake adjustment nut replated, it is not steel and will dissolve during the process.
Further protection
3M produce two excellent paint protection films and it may be worth considering the following:-
1. A patch on the front mudguard where the speedo cable rubs, this does eventually wear away the chrome plating.
2. A patch on the fuel tank between it and the seat, this also, given time, wears down to bare metal.
I used the 3M Ventureshield product with superb results, I will definitely use this on any future new vehicle paintwork.
Tip: If making your own template. Apply masking tape to the area you are going to protect and draw the shape required. Remove the masking tape, stick it onto a sheet of paper & cut it out. You now have a template for cutting out your shape from a sheet of paint protection film.